Lolita fashion is a street fashion (from Japan) that is depicted by a victorian/little bo peep/ doll like clothes, [overall] features that give a modest cute look about the wearer. Ethel was very muh aware that the dictionary definition of Lolita is far from the intended look, but here we go.
The subgenre of lolita fashion Ethel has chosen is none other than teh Kuro lolita; Kuro (meaning black in Japanese) is shown as what the meaning is...black. Think of it as the #allblackeverything of anime-like, cutesy, fashion.
The first step is the dress...

Start by measuring the distance of your (ehem) nipple line, then from the nipple to your side, then the side to the center of your back; seen here... the vertical (green) lines here are the distance, one, from your nippple to the desired length of your bodice and, two, from the center of back to the desired length.


Proceed by drawing those measurings onto paper and cutting them out. The front part is going to be drawn on a fold for an equal front part. The other two are pretty straight forward (as seen on your screen). The red lines are the curves Ethel applied to her patterns are touch the front becasue of her, ehem, "buxom" design. lol We've labeled them (with letters) to avoid confusion. Now for the circle skirt pattern. Your waist is going to be divided by 6.28 (which is 3.14/2) which is going to be your inner cirlce; the secondary curve is going to be as long you want (you'll see what we mean). After you've sketched, cut, and labeled them; it's time to cut them out onto your fabric.

Notice how Ethel pinned them down to make sure the folded fabric underneath doesnt move as you cut. Again, the front bodice is pinned on the fold.

don't forget the one or two inch seam allowance!

now for the circle skirt! the fabric is folded twice and on the corner with only folds is where you measure down for your inner circle from your paper. Again, the second circle is your choice (lolitas usually don't have a short skirt just foran FYI). To keep the curve consistent, Ethel used tailor's chalk and marked dots along the same distance using the tape measure and connected them, Don't know if you can see them. Being the neat freak perfectionist Ethel is, she used pins on the paper as well here. And then you cut it out!


Now for the "fun" part. lol


simply pin the shapes together and sew a straight line, hem teh top of the bodice all the way and you have your bodice!


Ethel wasn't comfortable with the bodice to skirt look so she created a waist band. This explanation is indicative of the heavily optional waist band for an extended skirt. Remember the key is modesty no one wants the skirt to be too high; and her, ehem, backside is quite high and the skirt would lift more than lay. SO she took her waist measurement and folded a strip of material that is about 8-10 inches wide, folded it in half (press if you need to) and sewed the raw part to the bodice.

sew the circle skirt aligning the inner circle to the waist band inverted and sew the back closed either fabric to fabric or using an invisible zipper. Ethel made her dress looser so she decided close it (fabric to fabric) in the back. But if you want a zipper here's a tutorial form youtube of the installation of a zipper :
https://www.youtube.com/watch?
v=q4Vj6tewv5k Almost done! Now for the straps!


for the straps, Ethel measured from the top of the bodice front and to the back bodice and cut two folded strips to that length; she pinned them to the respective measured spots. Don't worry,we'll decorate them later.
NOW FOR THE FUN PARRTT!!!


Ethel sewed her lacey trims onto her hems for that legit-lolita look. The trim on the right is because the circle skirt wasn't long enough for Ethel's taste so she sewed an extra [five inch wide] strip to the bottom of the circle and didn't like the line it made so she covered it with lace. lol

after the trims are done, take the time to look at your creation and decide where else your accents will be. So Ethel decided to sew a plethera of rectangles, and pinch the middles and sew it close and plan where she sewed them (by hand).

she put three in the back in order by size. The bands in the middle are optional (Ethel just didn't want the middle to be shown, again perfectionist lol)

The bodice was decorated by the same trimmings to coordinate with the bottom to match, you know look like the same dress.

the straps were not pressed and decorated with a tricky floral mesh combo trim. It's tricky because to not flatten the flowers, Ethel had to dodge the thread in the sewing machine.

there you have it, the Jumper skirt for Ethel's lolita cosplay!

the shirt Ethel got was a top from
http://www.fanplusfriend.com/ a neo-ludwig gothic websitetat has fabulous clothing. You can even give your measurements to have whichever top you see custom made for comfort!


this parasol Ethel bought from amazon,
https://www.amazon.com/gp/product/B00KR5T6A8/ref=oh_aui_detailpage_o08_s00?ie=UTF8&psc=1 and sewed a lace #trimonthebrim.


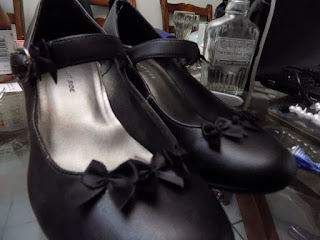
the shoes were thrifted (second hand) and garnished with tiny bows Ethel also got from amazon (sorry no link, you could search "black lolita bows")
aaaaand there you have it! a lolita cosplay/outfit for the con!


